The Yamaha TF1’s USB audio interface makes livestreaming your worship services straightforward and affordable. By connecting a single USB cable from your mixer to your streaming computer, you gain the ability to send professional-quality audio to OBS, vMix, or any other streaming platform. This guide walks you through configuring USB audio on the TF1 and integrating it with popular streaming software.
Understanding TF1’s USB Audio Capability
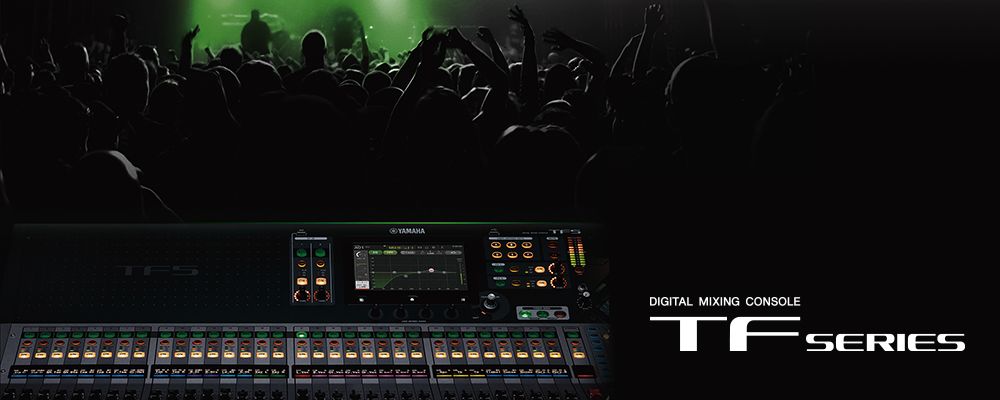
The TF1 functions as a multi-channel USB audio interface when connected to a computer. Rather than requiring a separate audio interface device, you use the mixer itself to provide audio to your streaming software. This streamlined approach reduces equipment complexity while maintaining professional audio quality.
The TF1 can send your main stereo mix via USB to your streaming computer. Your streaming software receives this audio just as it would from any other USB audio device. This clean, direct connection eliminates intermediate hardware and reduces potential points of failure.
Connecting USB to Your Streaming Computer
Locate the USB port on the TF1’s rear panel. Connect a standard USB Type-B cable—the kind commonly used for printers and similar devices—from the TF1 to an available USB port on your streaming computer. Use a quality cable of reasonable length, preferably not exceeding 15 feet, as longer cables can introduce latency or signal degradation.
Power on the TF1 and allow it to boot completely. Connect your microphones and instruments to the mixer and establish your basic mixing levels using the approach described in our TF1 setup guide. Your streaming audio will be sourced from whatever you send to the TF1’s main stereo output.
Configuring USB Audio Output
Navigate to the TF1’s System menu through the touchscreen and look for USB or Audio Device settings. The mixer needs to be configured to send your main mix to USB output. Most TF1 models default to this behavior, but verify it’s enabled before proceeding.
If your TF1 offers options for which output feeds the USB connection, ensure your main stereo output is selected. This is the output that feeds your sanctuary speakers—the same audio will simultaneously flow to your streaming computer via USB.
Setting Optimal Mixing Levels for Broadcast
Streaming audio has different level requirements than live PA. Aim for average levels around -18 dB on your main output meter with peaks reaching -12 dB. This provides headroom for unexpected loud moments while ensuring your audio sounds reasonably loud on viewers’ computers.
Many churches discover that streaming mixes need slightly more compression and careful level management than live mixes. A live audience can tolerate dynamic range—loud music, soft spoken words—but streaming viewers wearing headphones can find such variation jarring. Consider slightly more compression on vocal channels to smooth out performance variations.
Installing OBS and Configuring Audio Input
Open OBS Studio on your streaming computer. In the Settings menu, navigate to Audio. In the Devices section, find the Microphone selection. Choose the Yamaha TF1 from the dropdown list of available audio devices.
Once selected, OBS begins monitoring audio input from your TF1. You’ll see audio meters responding in the Audio Mixer panel at the bottom of OBS. Speak into your lead microphone on the TF1 and verify that the OBS meter shows levels responding appropriately.
If the TF1 doesn’t appear in OBS’s device list, verify the USB connection is secure. Try a different USB port on your computer. Restart OBS and the TF1, which often resolves driver recognition issues on Windows systems.
Setting Optimal Levels in OBS
In OBS’s Audio Mixer, you’ll see the input from your TF1. Adjust the fader for this input to set appropriate level. Your goal is having average speech or music sit around -18 dB on OBS’s meters, with peaks around -12 dB.
If your TF1’s output is too quiet for OBS, you can boost the input level in OBS’s mixer. However, it’s better to adjust the mixing level on the TF1 itself. This approach keeps everything at professional levels throughout your signal chain rather than compensating for low levels in software.
Configuring vMix Audio Input
If you’re using vMix instead of OBS, the setup is equally straightforward. In vMix’s Audio tab, select the Yamaha TF1 from the input device dropdown. vMix will immediately begin receiving audio from your mixer.
Use vMix’s audio mixer to set appropriate input level, again targeting -18 dB average with -12 dB peaks. vMix’s meters are intuitive and provide clear feedback about your audio levels.
Testing USB Audio Before Your First Stream
Before streaming live, run a complete rehearsal with USB audio engaged. Record a few minutes of your worship rehearsal to a file, then listen to the recording. Does the audio sound clear and intelligible? Are levels consistent? Are there any drops or audio glitches?
If you encounter issues, troubleshoot them during this rehearsal phase rather than discovering them during your first live broadcast. Most problems are resolved through simple USB cable replacement or port reselection.
Protecting Against Audio Clipping
Audio clipping—where signal exceeds the maximum the system can handle, creating harsh distortion—is the enemy of professional audio. Prevent this by maintaining proper level discipline. On the TF1, ensure your input gains are set correctly. On your streaming software, ensure the TF1 input doesn’t exceed -12 dB peak level.
Many streaming platforms apply automatic compression to incoming audio, which can help protect against sudden peaks. However, don’t rely on this—maintain proper levels at the source instead.
Simultaneous Recording and Streaming
Some churches want to simultaneously stream to Facebook and record locally for archive or podcast purposes. Your streaming software handles multiplatform delivery—OBS and vMix can stream simultaneously to multiple platforms. The TF1 simply provides audio to your computer; your software determines where that audio goes.
If you also want to record locally while streaming, enable local recording in your streaming software. OBS calls this “Simple Recording Mode” or “Advanced Recording Mode.” vMix has recording options in its interface. Your TF1’s audio feeds both the stream and your local recording simultaneously.
Troubleshooting Audio Dropout During Streams
If you experience audio cutting in and out during streaming, check your USB cable first. Reseat it on both ends to ensure solid connection. If dropout persists, try a different USB cable—worn cables are a common cause of intermittent connection issues.
If your computer’s CPU is heavily loaded, audio dropout can occur. Close unnecessary applications during streaming, reduce the complexity of your OBS scene, or upgrade to a more powerful streaming computer. Streaming video and audio simultaneously requires adequate processing power.
Network Streaming vs USB Audio
USB audio provides your local audio to OBS or vMix. Your streaming software then sends this audio to the internet along with video from your camera. If you experience poor internet connectivity, video quality might degrade, but your USB audio connection is unaffected—you’ll continue sending good audio locally to your streaming software.
This separation between local audio quality and internet streaming quality means that temporary internet hiccups don’t cause audio dropouts in your local monitoring. Your viewers might experience buffering, but your audio remains clean and stable.
Your Yamaha TF1 now provides professional streaming audio to your online congregation, enabling you to reach beyond your physical sanctuary and serve members watching from home or away.
For the livestream: Why your church livestream sounds bad, and how a separate stream mix fixes it, and getting the sound board into OBS, vMix, or an ATEM.