One of the Yamaha MG16XU’s most valuable features for churches is its integrated USB interface. Rather than requiring a separate audio interface device, the mixer itself sends audio to your streaming computer via USB. This guide walks you through configuring the MG16XU’s USB output and integrating it with OBS Studio for straightforward livestreaming.
USB Audio Interface Basics
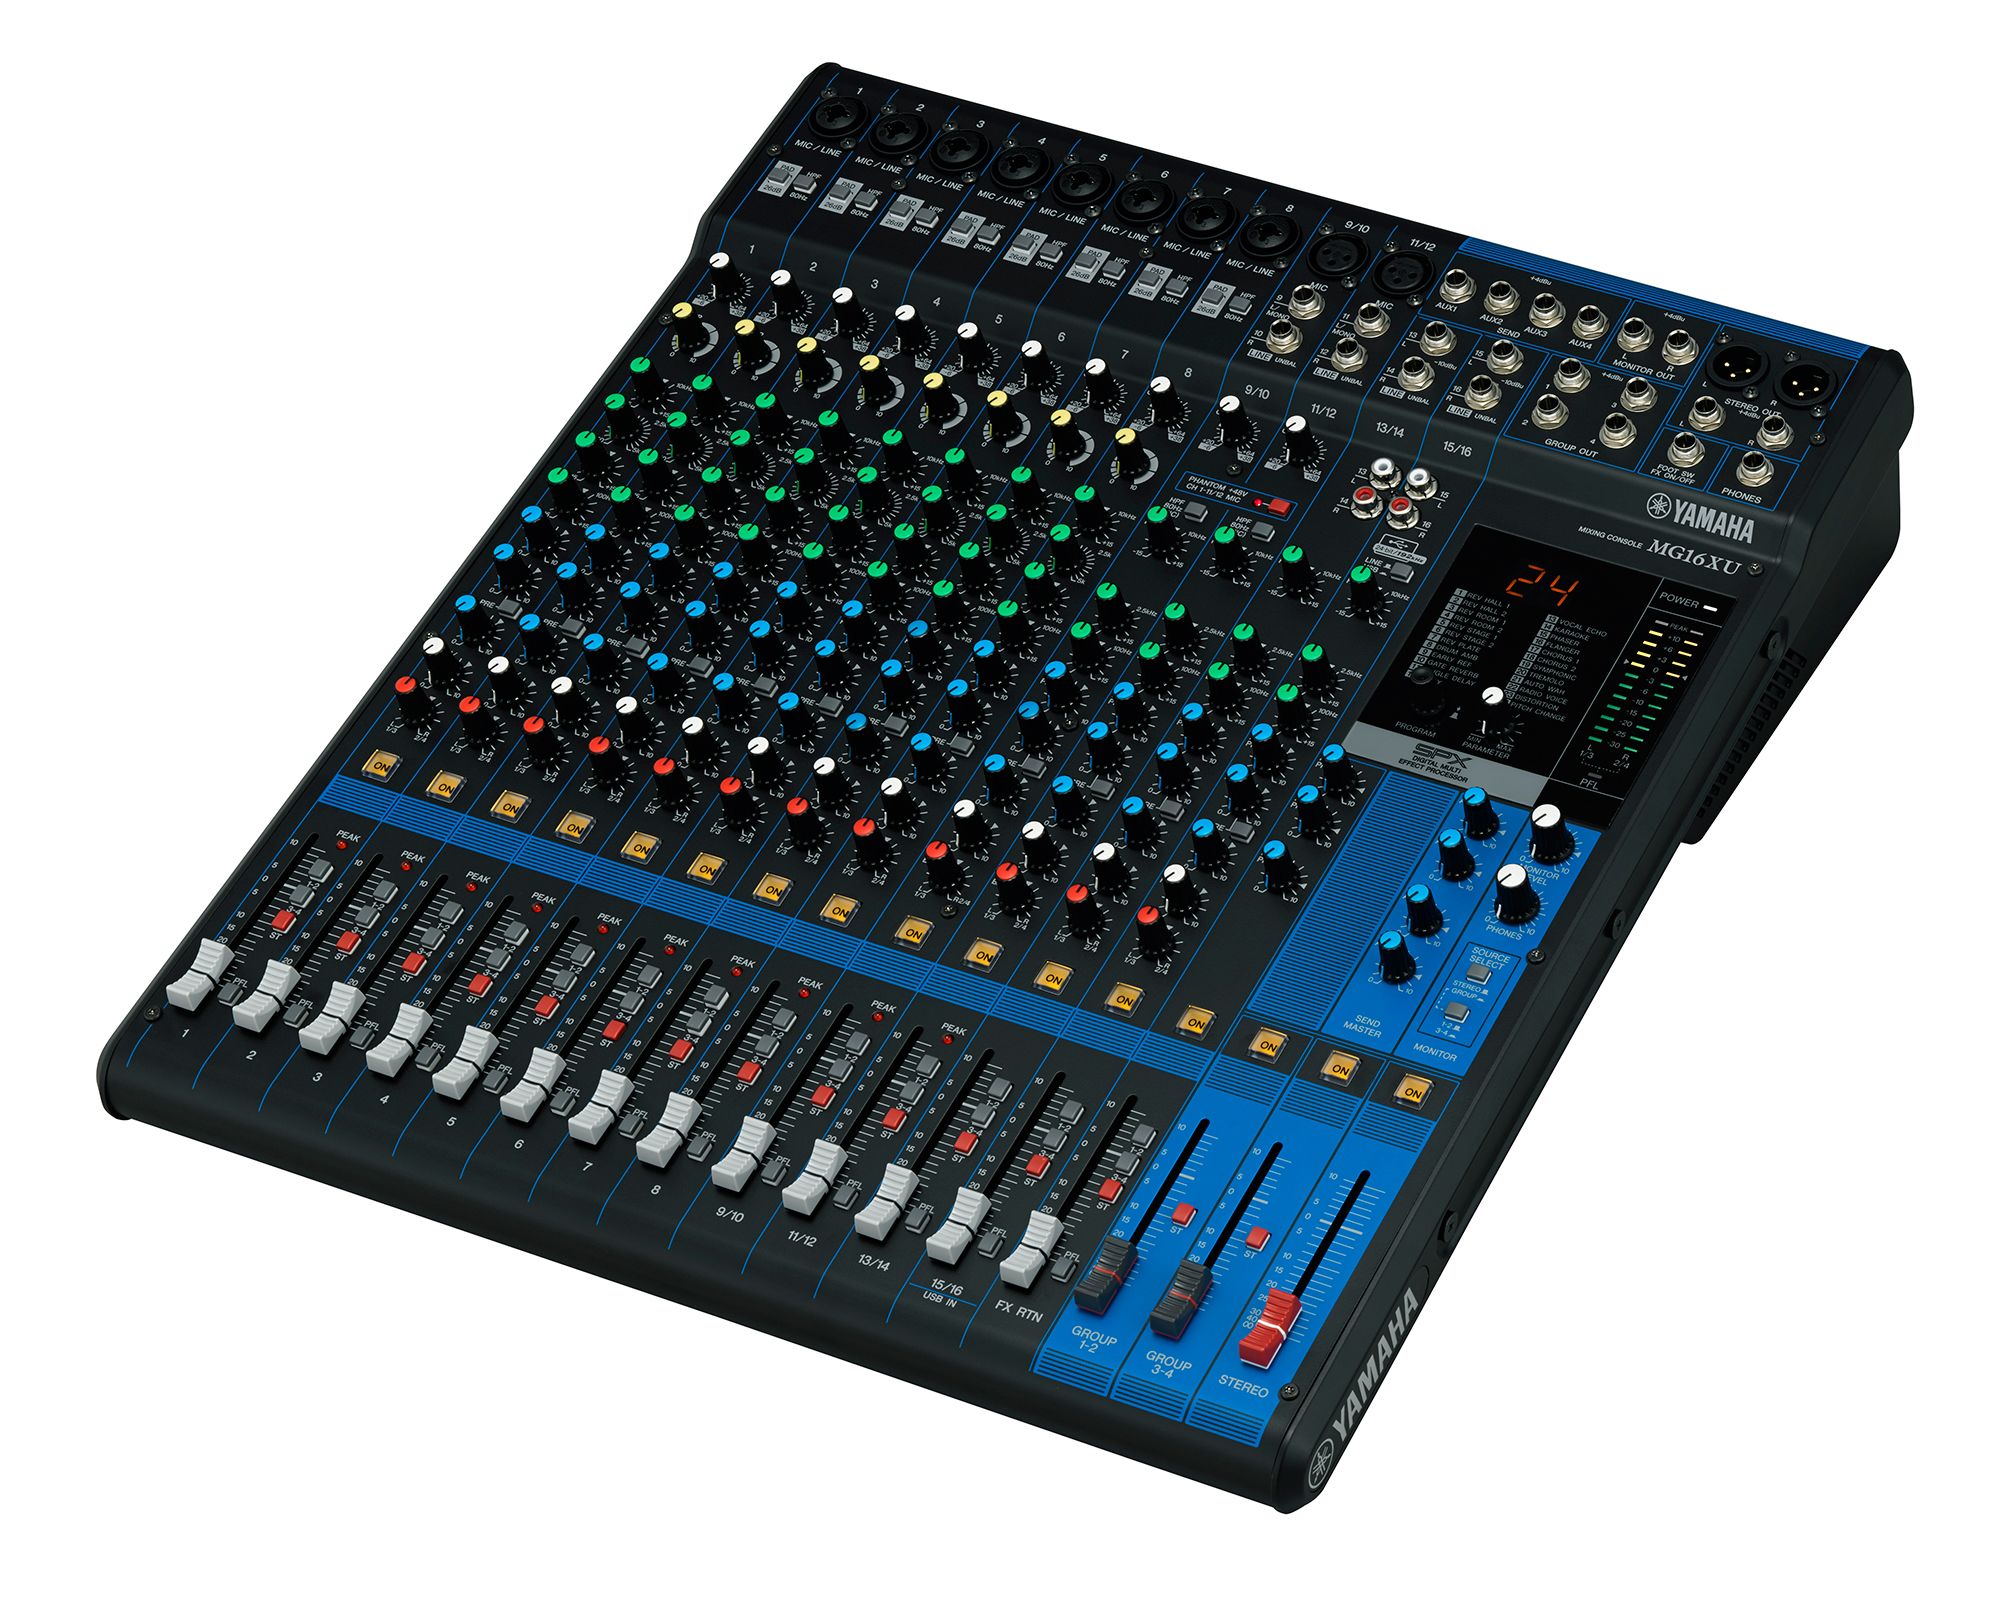
The MG16XU functions as a USB audio device when connected to a computer. Your streaming computer recognizes it just like any other audio interface—USB microphone, audio interface, etc. Once properly configured, OBS can receive clean, professional audio from your mixer’s USB output.
This direct connection eliminates intermediate devices and simplifies your audio chain. Fewer cables and devices means fewer potential failure points and simpler troubleshooting when problems arise.
Connecting USB from MG16XU to Your Computer
Locate the USB port on the MG16XU’s rear panel. This is a standard USB Type-B port, the same type used on many printers and professional audio equipment. Connect a high-quality USB cable from this port to an available USB port on your streaming computer.
Use quality cables with proper shielding. Avoid extremely long cables—keep your run under 15 feet if possible. Longer cables can introduce latency or signal degradation that affects streaming quality.
Power on the MG16XU and allow it to boot. Your streaming computer should automatically detect the MG16XU as a USB audio device within seconds. If it doesn’t appear, try a different USB port on your computer or restart both devices.
Verifying USB Device Recognition
On Windows, open Sound Settings and look for the MG16XU in your audio input devices list. On Mac, open System Preferences > Sound and look for the mixer in the input devices. The exact location varies by operating system, but the principle is the same: your operating system should recognize the mixer as a USB audio device.
If the MG16XU doesn’t appear, your computer might require drivers. Visit Yamaha’s website and download the latest MG16XU drivers for your operating system. Install these drivers and restart your computer. After restart, the MG16XU should appear in your audio settings.
Installing OBS Studio
Download OBS Studio from obsproject.com and install it on your streaming computer. OBS is free, open-source software that handles video and audio capture, mixing, and streaming to multiple platforms simultaneously.
Launch OBS and you’ll see the main interface. Don’t worry about video setup yet—focus on audio configuration first. You want to ensure your audio feeds from the MG16XU to OBS correctly before introducing video complexity.
Configuring OBS Audio Input
In OBS, navigate to Settings > Audio. Under the Devices section, find the Microphone dropdown. Click this dropdown and select the Yamaha MG16XU from the list of available audio devices.
Once selected, OBS begins monitoring audio input from your mixer. You should see the audio meter in the Audio Mixer panel at the bottom of the OBS window responding when you speak into your microphones on the MG16XU.
Setting Appropriate Audio Levels
OBS’s audio mixer shows a meter for each input source. Your MG16XU input should show audio levels responding to your mixing. Speak into your microphones on the mixer and watch the OBS meter.
Adjust the input level slider in OBS’s Audio Mixer until your average levels sit around -18 dB with occasional peaks reaching -12 dB. This provides professional broadcast levels with adequate headroom. If audio is too quiet, boost it by moving the slider up. If it’s too hot, bring it down.
Alternatively, you can adjust levels on the MG16XU itself before they reach OBS. This approach—handling levels at the source rather than in software—is generally preferable as it maintains professional signal levels throughout your entire chain.
Creating Your First OBS Scene
An OBS Scene is a collection of sources—video from cameras, audio from your mixer, graphics overlays—that you display simultaneously during streaming. For a simple church stream, you might have a single scene containing a camera feed and audio from your MG16XU.
Create a new Scene in OBS. Add a Video Capture Device source (if you have a camera) or a color background. The audio is already feeding OBS from your MG16XU input, so you don’t need to add audio sources separately. Audio input comes through the global device settings, not individual sources.
Testing Before Your First Broadcast
Before streaming live, run a complete test. Start OBS, ensure your MG16XU is feeding audio properly, and watch your meters while speaking into your microphones. Does audio level look appropriate? Does the meter respond smoothly without dropouts?
Do a test stream to a private YouTube stream or similar. Let the stream run for a few minutes while your worship team practices normal music and speaking. Monitor the stream from a different device and listen to how the audio sounds on the receiving end.
This test rehearsal reveals any issues before your first public broadcast. Most problems are easily resolved once identified during testing.
Handling Dynamic Range in Streaming
Unlike live PA, streaming audio benefits from controlled dynamic range. Voices that sound great in the room might seem to disappear on headphones. Music that feels energetic live might overwhelm viewers.
Consider adding light compression to your MG16XU’s main output. Many channels on the MG16XU include built-in compression—use these on your vocal channels to smooth out performance variations. A gentle compressor with 4:1 ratio and moderate threshold creates consistency without sounding obviously processed.
Multi-Platform Streaming
OBS can simultaneously stream to multiple platforms—YouTube, Facebook, Twitch, etc. Configure each platform’s streaming settings in OBS, then when you start streaming, OBS sends your video and audio to all configured platforms simultaneously.
The MG16XU simply provides audio to OBS. OBS handles multiplatform delivery. This approach means you reach all your online communities with a single streaming setup.
Troubleshooting Audio Dropout
If you experience audio cutting in and out during streaming, first check your USB cable. Reseat it firmly on both ends to ensure solid connection. If dropout continues, try a different USB cable—worn or defective cables are the most common cause.
If audio dropouts occur sporadically, your computer’s CPU might be overloaded. Close unnecessary applications, reduce the complexity of your OBS scene, or upgrade to a more powerful computer. Streaming video and audio simultaneously requires adequate processing power.
Local Recording Alongside Streaming
OBS can simultaneously stream and record locally. Enable Local Recording in OBS’s file settings. OBS will save a copy of your complete stream to your computer’s hard drive while simultaneously broadcasting.
These local recordings become valuable archives. You can edit them for podcast production, create highlight clips for social media, or maintain them as ministry archives.
Your Yamaha MG16XU with OBS now provides complete livestreaming capability. This budget-friendly approach enables your church to reach beyond your physical location and serve members watching from home without major equipment investment.
For the livestream: Why your church livestream sounds bad, and how a separate stream mix fixes it, and getting the sound board into OBS, vMix, or an ATEM.