The Yamaha TF1 stands as one of the most accessible entry points into professional digital mixing for churches. With sixteen local inputs feeding 40 input channels, intuitive touchscreen interface, and excellent built-in processing, the TF1 handles typical small-to-medium church worship setups with ease. This guide walks you through fundamental setup, getting your audio connected and flowing properly to your sanctuary speakers.
Understanding the TF1’s Architecture
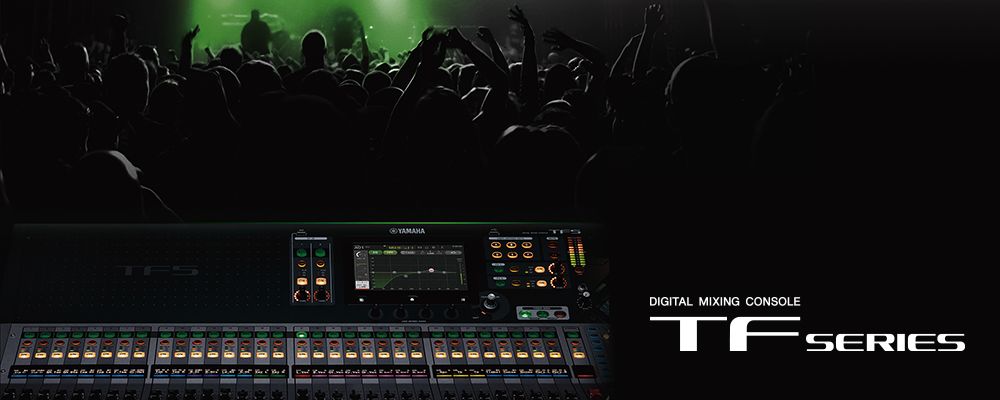
The Yamaha TF1 has 16 analog mic/line inputs on XLR/quarter-inch combo jacks plus two stereo RCA inputs, feeding 40 input channels, with expansion options available through digital networking. For churches starting their digital mixing journey, the 16 local inputs often prove sufficient for foundational worship setups.
The TF1’s mixing architecture includes 20 aux buses (8 mono and 6 stereo) for monitor mixing, effects sends, or broadcast feeds. Unlike some smaller consoles that force compromises, the TF1 provides genuine flexibility in how you route and combine audio. The user interface, centered around a seven-inch color touchscreen, presents all mixing functions in a logical, easy-to-navigate layout.
Connecting Power and Initial Startup
Connect the TF1 to a quality power conditioner using the included power cable. Avoid plugging directly into wall outlets where power surges might damage the sensitive electronics. Once powered, the mixer displays the Yamaha logo on its touchscreen and enters bootup mode.
Allow approximately 30 seconds for the TF1 to fully initialize. You’ll see the main mixing interface appear on the touchscreen. At this point, the mixer is ready for audio connection. Before connecting any audio sources, ensure all input faders are turned completely down to prevent sudden loud sounds that might startle you during initial testing.
Connecting Your Microphones
Begin connecting your wireless microphone receivers to the TF1’s analog inputs. Use XLR cables for best signal quality and noise rejection. Assign your lead vocal microphone to input one, backup vocals to input two, and ambient room microphone to input three, establishing a consistent channel organization that your team will rely on.
With microphones connected, switch to the input gains tab on the touchscreen. Speak into your lead vocal microphone and watch the input one gain meter on the display. Adjust the input gain until your average speech shows approximately -12 dB peak level. Do this for each microphone input, ensuring consistent gain structure across all vocal inputs.
This consistent gain staging—setting input levels so that adequate headroom exists without excessive digital amplification—is foundational to good mixing. Establish this discipline now, and your mixing will sound clean and professional.
Connecting Instruments and Line-Level Audio
If your church uses acoustic or electric instruments, connect them to the TF1’s remaining inputs. Keyboards typically connect as line-level audio rather than microphone level, so check your keyboard’s output specifications. Most modern keyboards provide output levels around -10 dB (line level) rather than the -40 dB (microphone level) that wireless receivers provide.
Set your line-level inputs at unity gain (0 dB) on the input gain control, then adjust actual mixing level through the channel faders on the main mixing screen. This approach provides flexibility for different instruments with different output levels while maintaining good gain structure.
Connect a backing track or worship music playback device—typically from a laptop or tablet running worship music software—to a dedicated input. This playback often serves as your musical foundation, with live musicians adding layered elements.
Configuring Your Main Output
With all inputs connected, route them to your primary mixing bus. On the TF1’s touchscreen, navigate to the Faders view. You’ll see each input channel displayed as a fader. Below or beside each channel, you’ll see a button labeled “MIX1” or similar. Press this button for each channel you want in your main mix.
A simple church worship mix might include: lead vocal, backup vocal, keyboard, acoustic guitar, and backing track. Press MIX1 for each of these inputs, assigning them to your main mixing bus. Don’t include ambient room microphones in your main mix—these serve monitoring and broadcast purposes, not the primary PA feed.
The TF1’s main stereo output connects to your powered speakers or amplifier. Ensure this connection is properly made before continuing. All the mixing you’ve configured now routes through this connection and feeds your sanctuary speakers.
Setting Initial Mixing Levels
Now adjust the TF1’s physical faders to establish initial mixing balance. Start with the backing track fader pushed up to approximately -6 dB (typical reference level for background music). Then bring up your lead vocal fader until it sits prominently above the backing track—typically around -12 to -8 dB.
Add remaining instruments at appropriate levels relative to vocals. Keyboards might sit around -12 dB, acoustic guitar around -15 dB, and backup vocals slightly lower than lead vocals. These aren’t absolute numbers—your specific room, sources, and worship aesthetic determine exact levels. However, this starting point provides a reasonable baseline.
Watch the main output meter on your TF1. Your goal is average levels around -18 dB with occasional peaks reaching -12 dB. This provides healthy headroom for your audio system and protects against clipping if any source suddenly gets louder.
Saving Your Baseline Setup
The TF1 includes Scene memory capability for saving and recalling mix states. Navigate to the Show menu on the touchscreen and create a new Scene. Name it something clear like “Sunday Baseline Setup.” The mixer records your current fader positions, mute states, and processing settings.
Saving this baseline provides insurance against accidental changes. If a volunteer accidentally unmutes a channel or moves a critical fader during setup, you can instantly recall your baseline scene and get back to a working state. This simple practice has prevented countless technical disasters during actual services.
Creating Multiple Scenes for Service Structure
If your service includes distinct segments with different audio needs, create separate scenes for each. Create a “Sermon Setup” scene where instrumental channels are muted and the lead vocal is prominently featured. Create a “Worship Song Setup” where all instruments are active and balanced together.
During your actual service, transitioning between scenes happens in seconds. Your operator presses the scene recall button at the appropriate moment, and instantly the mixer reconfigures itself for that portion of worship. This eliminates manual fader adjustments during actual services and dramatically reduces the chance of technical errors during crucial moments.
Basic EQ and Processing
Each TF1 channel includes built-in parametric EQ. For your lead vocal input, consider adding gentle EQ to compensate for your room acoustics or microphone characteristics. A slight presence peak around 3-4 kHz can enhance vocal clarity. A gentle dip around 200 Hz reduces muddy low-frequency buildup.
Don’t get carried away with processing at this stage. Your goal is establishing a stable baseline that sounds good, not creating sophisticated mix aesthetics. More detailed processing can come later as your mixing expertise develops.
Testing Before Your First Service
Before trusting the TF1 with your first live service, conduct a full rehearsal using all the mixing techniques you’ve learned. Have your worship team run through several songs. Make notes about any adjustments you need to make—perhaps a vocalist needs slightly higher level, or the backing track sits too prominently.
Make these adjustments during rehearsal, then save your updated scene. By the time your first live service arrives, your mixing setup has been tested and refined, giving your team tremendous confidence in the technical stability of your audio.
Your Yamaha TF1 is now configured and ready for reliable worship audio. In upcoming articles, we’ll explore using StageMix for iPad remote control and capturing audio for livestreams.