
The ATEM Mini Pro is the step up from the ATEM Mini, and it adds a capability that transforms your setup: direct streaming to YouTube and Facebook without needing a separate PC. If you’ve been running OBS on a dedicated streaming computer, the ATEM Mini Pro lets you simplify that entire layer and stream directly from the device.
This guide covers the physical setup, Ethernet connection, and how to configure direct streaming so you can go live with minimal infrastructure.
Physical Setup and Connections
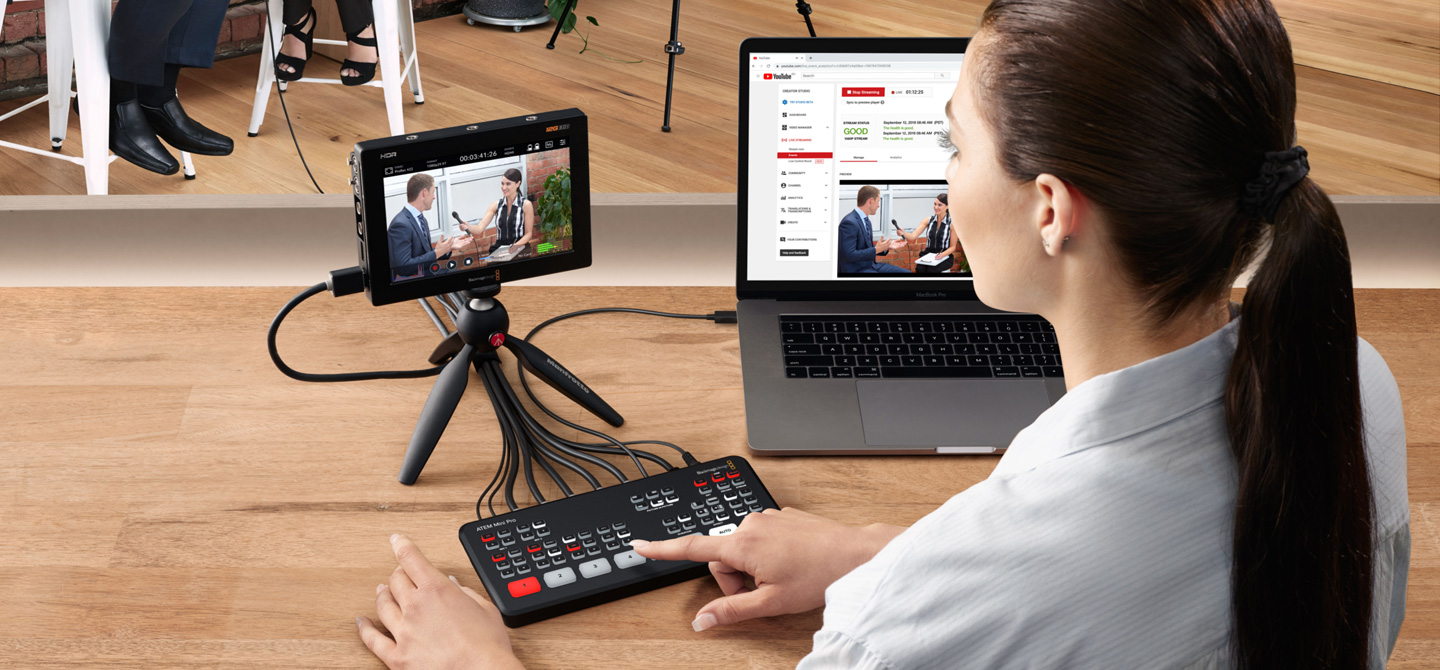
The ATEM Mini Pro is slightly larger than the standard ATEM Mini, but it still fits comfortably in an AV closet or equipment rack. Out of the box, you’ll find the switcher, a power adapter, and an Ethernet cable. The addition of Ethernet is the key difference—this is what enables direct streaming without a PC.
Connect your HDMI camera sources to any of the six HDMI inputs, just as you would with the ATEM Mini. The video signal flow is identical. But now, instead of also running a USB cable to a streaming PC, you’ll connect Ethernet to your church’s network.
Connect the Ethernet cable from the back of the ATEM Mini Pro directly to a wall jack or your network switch. The ATEM Mini Pro will obtain an IP address from your church’s DHCP server automatically. If your church doesn’t have DHCP, or if you want to assign a static IP, you’ll do that through ATEM Software Control once you’ve got the device on your network.
The ATEM Mini Pro has a small LCD screen and physical buttons, just like the ATEM Mini. You can operate it directly, or use ATEM Software Control on a networked PC for more advanced features.
Connecting ATEM Software Control Over Your Network
Download and install ATEM Software Control on a PC on your church’s network. When you open the application, it will automatically discover the ATEM Mini Pro by searching your network. Click on the device, and you’re connected.
This is a key difference from the ATEM Mini: with the Mini, the PC controls it via USB and also receives video via USB. With the Mini Pro, the PC controls it over Ethernet (no video), and the ATEM Mini Pro handles all video output—either to HDMI outputs on the device itself or to YouTube/Facebook directly.
Once connected in ATEM Software Control, you’ll see the same interface you’re familiar with: preview and program buses, audio mixer, macros, and so on. The control experience is identical to the ATEM Mini. The difference is in the output.
Configuring Direct Streaming
This is the game-changer. Open ATEM Software Control and navigate to the Streaming section (usually under Settings or Control Panel). You’ll see options to configure YouTube or Facebook streaming directly from the ATEM Mini Pro.
For YouTube, you’ll need your stream key, which you get from YouTube Studio. Log into your church’s YouTube channel, go to Settings > Streaming, and copy your Stream Key. Paste this into ATEM Software Control’s YouTube configuration. Do the same for Facebook if you want to stream to both platforms simultaneously.
The ATEM Mini Pro can stream to one or two destinations at once. This means you could stream to YouTube and Facebook simultaneously, giving your congregation options for where they want to watch. YouTube and Facebook have slightly different video quality requirements, but the ATEM Mini Pro handles that automatically.
Setting Resolution and Bitrate
Configure your streaming resolution in ATEM Software Control. The ATEM Mini Pro can stream at 1080p30 or 720p60. For most churches, 1080p30 offers better picture quality, while 720p60 is slightly lower quality but smoother motion.
Set your bitrate appropriately for your internet upload speed. The ATEM Mini Pro defaults to 5000 Kbps for YouTube, which requires about 6 Mbps upload speed. If your church’s internet is slower, reduce the bitrate to 4000 Kbps or even 3000 Kbps. You’ll lose some quality, but you’ll have a stable stream that doesn’t drop out.
Before your first Sunday broadcast, test your streaming setup with an unlisted YouTube video. Start streaming, let it run for five minutes while you switch cameras and adjust audio, then check how it looks. Listen for audio sync issues and verify that the picture quality meets your expectations.
Audio Configuration
Audio on the ATEM Mini Pro works the same way as the ATEM Mini: RCA input from your mixer, 3.5mm jack for a microphone, and on-device audio mixing. Configure your mixer to output to the RCA input, just as described in the audio routing guide.
In ATEM Software Control, navigate to Audio Mixer and verify that your RCA input is active and showing healthy levels. The audio embeds directly into your YouTube/Facebook stream, so there’s no separate audio configuration needed for streaming.
Monitor your audio levels before each service. Have someone speak and sing while you watch the audio meters in ATEM Software Control. You’re aiming for peaks in the green zone, with no red clipping.
Multiview Output and Confidence Monitoring
The ATEM Mini Pro has an HDMI output dedicated to multiview—a display showing all of your camera feeds at once plus audio meters and other information. This is invaluable for your switcher operator or anyone monitoring the production. Connect a monitor to the Multiview HDMI output, and your operator can see all inputs simultaneously, plus what’s currently on the program feed.
This lets your operator see what’s coming next before switching, giving them confidence and allowing for smoother transitions.
Comparison to the ATEM Mini with OBS
For most churches, the ATEM Mini Pro simplifies your setup compared to running the ATEM Mini with OBS on a PC. You eliminate the need for a dedicated streaming PC, which reduces power consumption, cooling requirements, and complexity.
The trade-off is that the ATEM Mini Pro offers less customization than OBS. You can’t add graphics overlays, custom scenes, or lower-thirds in the ATEM Mini Pro—those features require a PC and OBS. If you need that level of control, you might stick with an ATEM Mini and OBS, or you might run the ATEM Mini Pro for basic streaming and use a second PC running OBS for more elaborate broadcasts.
Many churches use the ATEM Mini Pro for regular services (simple, straightforward streaming) and upgrade to an ATEM Mini with OBS for special events where they want custom graphics.
Network Bandwidth Considerations
Direct streaming from the ATEM Mini Pro sends video to YouTube over your church’s internet connection, so you need adequate upload speed. A stable 6+ Mbps upload is ideal for 1080p streaming. If your church’s internet is shared with computers doing other work, you might experience dropouts during streaming.
Consider dedicating your ATEM Mini Pro’s network connection to a separate port on your network switch, isolated from general office traffic if possible. Some churches add a cellular backup using a mobile hotspot configured in ATEM Software Control, so if the primary internet fails, the broadcast continues over cellular. This is a premium feature but worth considering for churches that broadcast every week.
Switching Operations During Service
With the ATEM Mini Pro, your switcher operator uses either the physical buttons on the front of the device or ATEM Software Control on a networked PC. Most churches position a monitor at the ATEM Mini Pro location running ATEM Software Control so the operator has full control and visibility.
Everything works as it does with the ATEM Mini: you preview a camera, move the T-bar to execute the transition, and adjust audio levels as needed. The difference is that your output is going directly to YouTube—there’s no OBS in the middle.
Your First Service with the ATEM Mini Pro
On Sunday morning, power up the ATEM Mini Pro and verify that your Ethernet connection is active. Open ATEM Software Control to confirm the device is connected and responding. Check your audio levels and do a quick camera test.
Start your YouTube stream about five minutes before service. The stream will appear on your YouTube page within 10–15 seconds. Do a final audio check with someone speaking into a microphone, and you’re ready to go live.
Switch cameras as the service progresses, exactly as you would with an ATEM Mini. Your video and audio stream to YouTube automatically. When the service ends, stop the stream in ATEM Software Control, and you’re done. Your YouTube recording saves automatically.
The ATEM Mini Pro is a powerful tool for churches that want professional streaming without the complexity of managing a separate PC. If you’re already comfortable with switching and audio mixing, the ATEM Mini Pro is a straightforward upgrade that gives you more autonomy and simplicity.