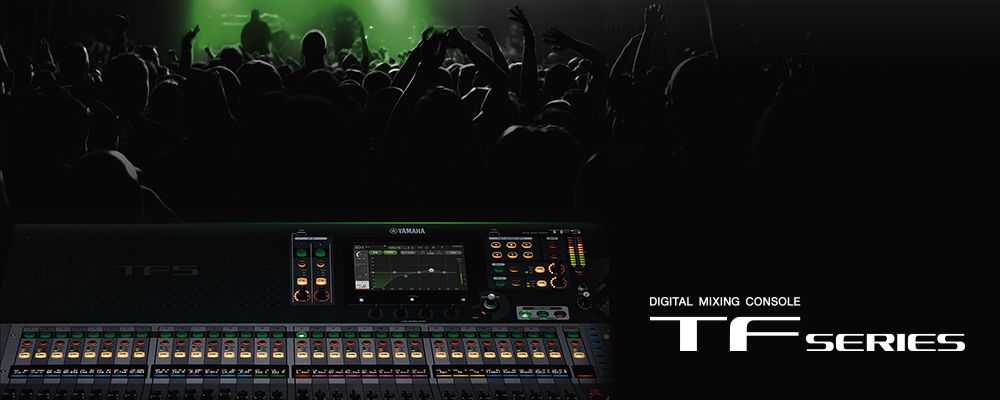
Dante networking transforms how large church facilities manage audio infrastructure. Rather than running dozens of individual microphone cables from stage to mixing location, Dante carries 64 channels of professional-quality audio over a single Gigabit Ethernet connection. This article walks you through physically installing a Dante NY64-D card in your Yamaha TF5 and configuring the resulting audio network.
Understanding Dante Networking
Dante is an industry-standard audio networking protocol that carries professional-quality audio over standard Ethernet infrastructure. Unlike proprietary systems from individual manufacturers, Dante works with equipment from multiple brands: Yamaha, Shure, Behringer, and many others. This manufacturer-agnostic approach makes Dante particularly valuable for churches building multi-brand audio systems.
The NY64-D card specifically provides 64 channels of Dante audio I/O to the TF5. This might seem like overkill for a single church, but in reality, you’re not receiving 64 individual channels. Instead, you’re receiving audio flows that might represent multiple stage boxes, wireless systems, or other networked audio devices, all aggregated into your mixer through Dante.
Physical Installation: Preparing the TF5
Power off your TF5 completely and disconnect all cables. Allow the mixer to sit unpowered for five minutes to ensure all capacitors have discharged. Safety is paramount when working with internal mixer components.
Locate the expansion card slot in the TF5. This is typically on the rear panel near other connectivity options. Check your TF5’s documentation to identify the exact location. The card slot is usually protected by a metal plate that you’ll need to remove.
Remove the protective plate by unscrewing the fasteners holding it in place. Note the orientation and style of fasteners so you can reinstall them correctly. Set all fasteners aside in a small container to prevent losing them.
Installing the NY64-D Card
Carefully examine the NY64-D card and the card slot. The card has a distinctive shape with edge connectors that must align precisely with the slot. There’s typically only one correct orientation, and the card design prevents misinstallation through keying features.
Hold the NY64-D card by its edges, avoiding the electronic components. Align the edge connectors with the slot opening and insert the card carefully but firmly. You should feel slight resistance, then a clear “click” as the card seats fully into the slot.
Once seated, secure the card with any fastening hardware provided. If the card came with a bracket or retention clip, install it according to the instructions. Proper physical security ensures the card won’t vibrate loose during operation.
Powering Up and Verifying Installation
Reconnect all cables to your TF5 and power it on. Allow the mixer to boot completely—this might take slightly longer than usual as it detects the new card. Once fully booted, navigate to the System Settings through the touchscreen.
In the System Settings, look for a Hardware or Card Status section. Your TF5 should list the installed NY64-D card, indicating successful recognition. If the card isn’t listed, power off, reseat the card slightly by removing and reinstalling it, then power on again.
Configuring Dante Networking
With the card recognized, navigate to the Network settings and look for Dante-specific configuration options. The TF5 should provide settings for Dante network addressing and audio routing.
Assign a static IP address to your Dante port if your network infrastructure requires it, or use DHCP for automatic addressing. Ensure your Dante network is properly configured with adequate bandwidth. Dante over standard Gigabit Ethernet works well for most churches, but high-density installations might benefit from dedicated network infrastructure.
Installing Dante Controller
Dante Controller is the software tool for managing Dante audio networks. Download it from Audinate’s website onto a computer connected to your network. Dante Controller allows you to see all Dante devices on your network and configure audio routing between them.
Open Dante Controller and you should see your TF5 listed. If not, verify that the TF5’s Dante port is connected to your network via Gigabit Ethernet. Click the TF5 to select it and you’ll see detailed information about the Dante connection.
Routing Audio Through Dante
In Dante Controller, you can route audio from Dante input devices to your TF5 and vice versa. If you have a Dante-enabled stage box—such as a Behringer Dante stage box or Shure wireless receivers with Dante outputs—it would appear in Dante Controller as an available source.
To route audio from a stage box to your TF5, click and drag from the stage box’s output in Dante Controller to the TF5’s input. This creates an audio flow that carries the stage box’s audio into the TF5. You can create 64 simultaneous audio flows, though most churches use a fraction of this capacity.
Managing Multiple Dante Devices
If you’re adding multiple networked audio devices—perhaps two stage boxes, wireless systems, and other equipment—Dante Controller becomes your central hub for managing all connections. Each device appears in Dante Controller, and you route audio between them centrally.
This centralized management is powerful. Instead of configuring each device individually, you manage your entire audio network’s routing from a single interface on your computer. Changes take effect instantly across your entire networked infrastructure.
Network Best Practices for Dante
Dante is remarkably robust, but proper network practices ensure reliability. Use dedicated network infrastructure for Dante if possible, rather than mixing AV equipment traffic with office network traffic. Managed Gigabit Ethernet switches designed for AV applications work better than generic networking equipment.
Keep your Dante network physically separate from WiFi routers and other RF sources that might introduce interference. While Dante operates over standard Ethernet, professional practice suggests treating your Dante network as specialized infrastructure worthy of dedicated hardware and careful cable management.
Backup Dante Connections
The TF5 and some Dante devices support redundant Dante connections for network reliability. If your network infrastructure includes multiple paths, configure redundancy in Dante Controller. This ensures that if a single network cable is accidentally disconnected, audio continues flowing through your backup path.
Test your redundancy configuration intentionally—deliberately disconnect a Dante cable and verify that audio routes through the backup connection without dropping. This testing confidence-building exercise ensures your redundancy actually works before you depend on it.
Expanding Your Dante Network
With Dante installed in your TF5, you can gradually expand your network. Add a Dante-enabled stage box when you’re ready to expand from your physical inputs. Add wireless microphone receivers with Dante outputs to reduce cable complexity on stage.
Each addition to your Dante network requires only Ethernet cable and configuration in Dante Controller—no additional mixer equipment. This scalability is why Dante has become the industry standard for networked audio in professional installations.
Troubleshooting Dante Connections
If devices don’t appear in Dante Controller, verify that they’re powered on and connected to your network. Check that all Gigabit Ethernet cables are properly seated at both ends. Restart the Dante-enabled devices and refresh Dante Controller.
If audio flows don’t appear in Dante Controller despite the devices being present, verify that your network has adequate bandwidth. Some enterprise network switches have settings that limit broadcast traffic, which interferes with Dante device discovery. Work with your IT department to ensure Dante traffic isn’t being restricted.
Your Yamaha TF5 with Dante networking now provides enterprise-grade audio infrastructure capable of supporting churches of any size. Through careful physical installation and network configuration, you’ve transformed your TF5 from a powerful standalone mixer into the centerpiece of a sophisticated audio network serving complex, multi-location facilities.