The PreSonus StudioLive 32S stands as a professional-grade digital mixing console engineered specifically for live sound environments. With 32 channels of mixing capability, sophisticated processing including the renowned Fat Channel, and AVB audio networking support, the StudioLive 32S handles the most demanding worship audio scenarios. This guide walks you through initial setup and getting your church’s audio infrastructure operating reliably.
Understanding the StudioLive 32S Architecture
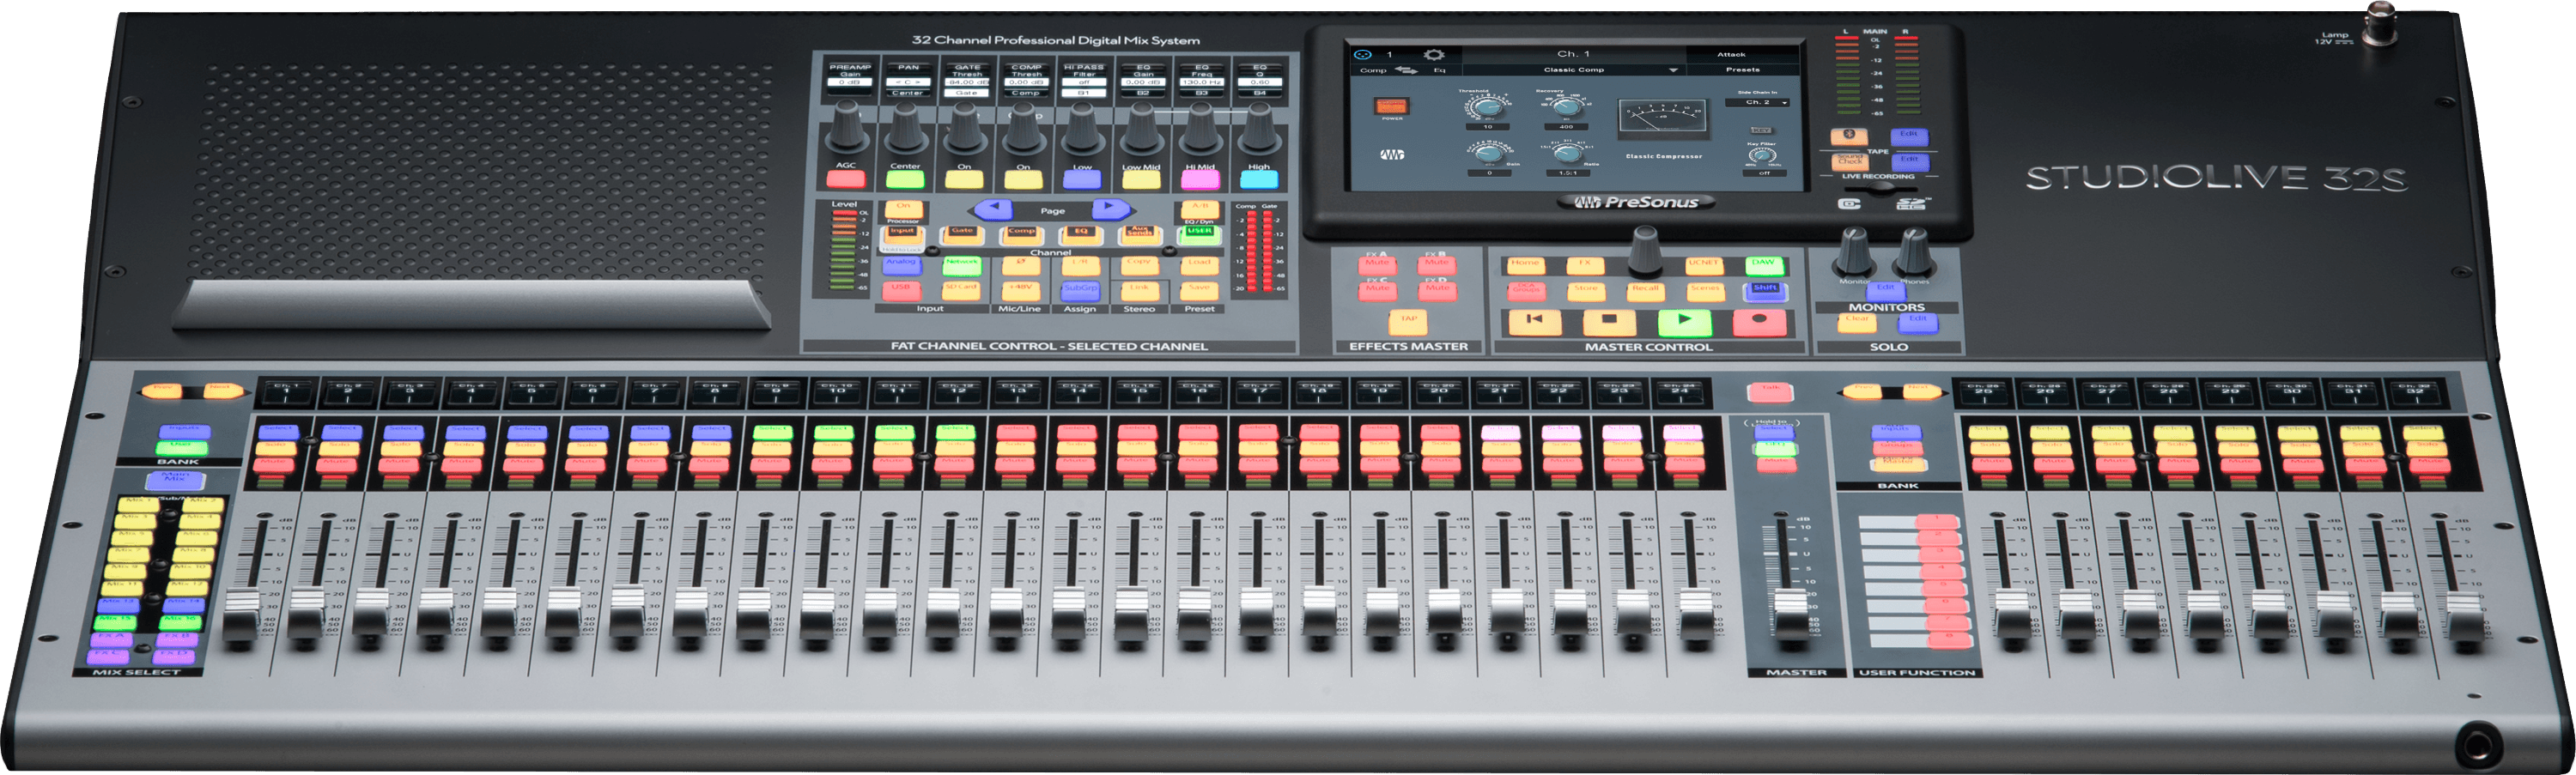
The StudioLive 32S provides 16 physical analog inputs expandable through AVB audio networking. The console features PreSonus’s proprietary Fat Channel processing on every channel—comprehensive EQ, compression, gating, and other dynamics tools that rival standalone hardware processors.
What distinguishes the StudioLive from competitors is its integration of full mixing capability with professional-grade processing built-in. Unlike some digital mixers where processing feels like an afterthought, the StudioLive treats sophisticated signal processing as central to its design.
Physical Installation and Power
The StudioLive 32S is a substantial console requiring dedicated counter space or professional installation. Unlike portable mixers, the 32S belongs in a fixed control room where it can be properly ventilated, cabled, and monitored.
Connect the mixer to a quality power conditioner using the included power cable. Avoid plugging directly to wall outlets—the power conditioner protects sensitive electronics and provides cleaner power that improves audio quality.
Allow 30-60 seconds for the mixer to boot after powering on. You’ll see the PreSonus logo on the touchscreen, followed by the main mixing interface.
Connecting Your Audio Sources
The StudioLive 32S provides 16 physical analog inputs via XLR and quarter-inch connectors. Connect your wireless microphone receivers, instruments, and playback devices to these inputs.
Set input gain carefully by speaking into microphones or playing instruments at typical service levels. Adjust the input gain trim until your average signal reaches approximately -12 dB peak level on the input meter. This consistent gain structure is foundational to professional mixing.
Understanding the Fat Channel Processing
Each StudioLive channel includes a comprehensive Fat Channel—a complete signal processing chain including high-pass filter, 4-band parametric EQ, compressor, gate, and limiter. This processing rivals standalone hardware units and enables you to craft professional-quality channel sound directly in the console.
Don’t use Fat Channel processing on every channel—that’s excessive. Instead, apply it thoughtfully: compression on vocal channels to smooth performance variations, EQ to correct microphone frequency response or room acoustics, gating on ambient mics to reduce room noise.
Building Your Main Mix
Route your processed input channels to your main stereo output. Use the physical faders on the console to set initial mixing balance. Start with your backing track at around -6 dB, then bring your lead vocal fader up until it sits prominently above the music.
Add remaining channels at appropriate levels. The goal is creating a musically balanced mix that sounds professional and allows each element to be heard clearly.
Configuring Flex Mixes
The StudioLive’s Flex Mixes are one of its most powerful features. Instead of fixed auxiliary buses, Flex Mixes are software-configurable buses that you can assign any combination of outputs to. This flexibility enables sophisticated mixing architectures.
Create your first Flex Mix for stage monitoring. Assign the sources your worship team needs to hear—kick drum, bass, vocals, and perhaps click track—at levels optimized for on-stage performance. This monitor mix is independent from your main mix, allowing each to be optimized for its purpose.
Create additional Flex Mixes for broadcast, overflow rooms, or effects processing. The StudioLive’s architecture supports complex mixing scenarios that smaller consoles simply cannot handle.
AVB Audio Networking
The StudioLive 32S supports AVB (Audio Video Bridging) networking, an industry-standard protocol for professional audio over Ethernet. This allows you to add networked input devices like stage boxes or wireless receivers without physical cable runs.
Configure the StudioLive’s AVB port to connect to your facility’s network. Consult your AVB device documentation for specific configuration details. Once properly configured, networked audio sources appear in the mixer’s channel pool just like local analog inputs.
Creating Scenes for Service Structure
Save your carefully configured mix state as a Scene. Create baseline scenes for different service segments: “Worship Opening,” “Sermon,” “Communion,” “Closing Song.” Each scene captures fader positions, muting states, and processing settings.
During services, recall the appropriate scene at each transition, instantly configuring the mixer for that service segment. This automation prevents human error and ensures consistency week to week.
Remote Control and Monitoring
The StudioLive supports remote control through the StudioLive Remote app on iPad. Configure this for flexible mixing where your operator can position themselves near the musicians or in different parts of the facility while maintaining full control.
Network connectivity is essential for remote control. Ensure your WiFi extends to your expected operating location or use a wired Ethernet connection if possible.
Backup and Redundancy
Export your show files regularly to USB backup. Keep multiple copies in different secure locations. Given the StudioLive’s role as the centerpiece of your audio infrastructure, protecting your carefully crafted mixing configurations is essential.
For critical installations, maintain a secondary mixer—perhaps a smaller StudioLive 16 or other digital console—as backup. This redundancy ensures that mixer failure doesn’t prevent services from proceeding.
Commissioning and Training
Before your first service using the StudioLive 32S, conduct extensive commissioning rehearsals. Have your entire mixing team practice with the console. Learn its interface, practice scene recalls, and become comfortable managing complex mixing scenarios.
Send key personnel to PreSonus training if possible. The StudioLive’s sophisticated features require more expertise to maximize effectively. Proper training prevents wasted potential and ensures your team uses the console effectively.
Your PreSonus StudioLive 32S now provides professional-grade mixing capability supporting the most sophisticated church audio requirements. Treat this console as the centerpiece of your ministry’s audio infrastructure, and it will serve you faithfully for many years.